Take advantage of our free album designer
We’ve partnered with Spreadu to give you a complimentary online album designer that makes the whole album process feel simpler, faster, and more natural.With Spreadu, you can design albums online, share layouts with clients, use built-in proofing, and keep your projects stored in one easy place. No downloads, no complicated software, just a smoother way to create and sell albums.

Step-by-Step Guide to Spreadu Designer
This short video will show you how easy it is to create an album in our free software.

Prefer other album creator?
You're more than welcome to use other software and our settings are integrated with the most popular programs like Smart Albums, Fundy, Album Stomp or Album Teller. Below table shows the correct spreads sizes, incase you're using another software.
Keep in mind:
1 spread = 2 pages
10 spreads = 20 pages
We work in cm, not inches
7 steps to gorgeous album design

Choose the right format
The format of your photo album sample will depend on what works best for the type of photography you’re showcasing, as well as what will appeal to your clients. Consider the size, orientation, and page count of the album. Larger albums may be better for showcasing detailed shots, while smaller albums may be more portable and accessible. The page count will depend on how many photos you want to include and how much space you want to give each photo. I usually average 4-5 images per spread.

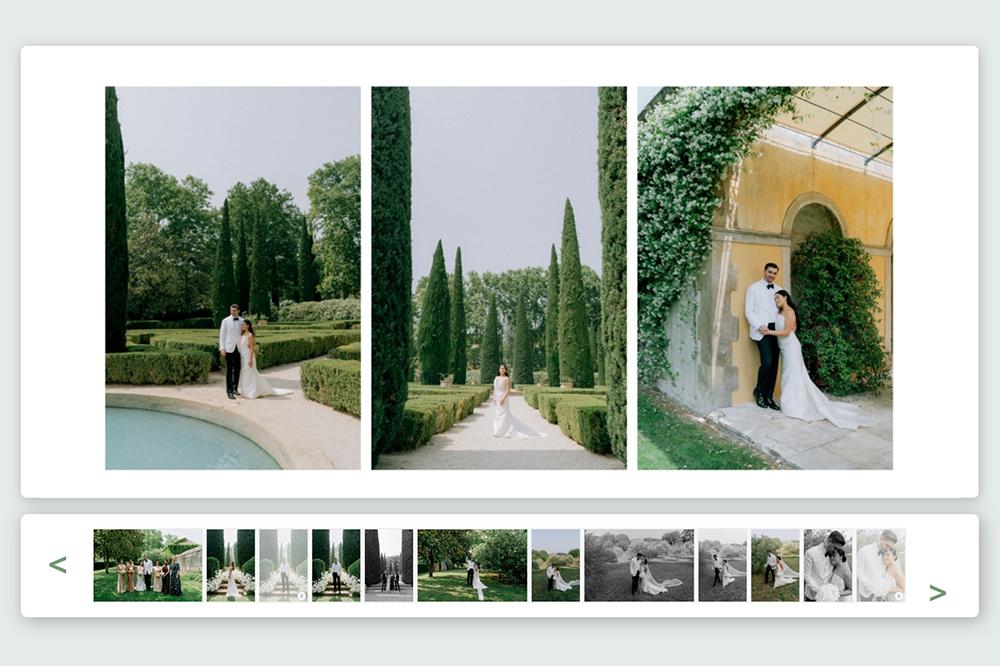
Tell a story with your photographs
A photo album should tell a story, whether it’s of a wedding, a family vacation, or another type of event. Consider the narrative you want to convey with your photos and sequence them accordingly. Think about the beginning, middle, and end of the story and how your photos fit into that narrative. I shoot with the album in mind, even if my clients don’t want an album – it actually makes me a better storyteller.

Include a mix of candid and posed shots
A well-rounded photo album should include a mix of candid and posed shots. Candid shots capture spontaneous moments and emotions, while posed shots are more formal and deliberate. The balance between the two will depend on the event or moment you’re documenting. Add at least 2 full spreads with one full-size image.

Choose a cover that matches your brand
The cover of your photo album is the first thing your clients will see, so it’s important to choose a colour and design that represents your brand and aesthetic. Consider using your logo or one of our templates. You can also personalise the back of the cover with most of our albums.

Do not mix colour and b&w images on the same spreads
It makes it difficult for the viewer to focus on the content of each image. When the eye has to constantly adjust from colour to black and white, it can cause visual fatigue and make it harder to appreciate the individual images.

Get feedback from others
Before finalising your photo album, seek feedback from other photographers or clients to ensure that it is well-received and appealing. Ask for constructive criticism and take any feedback into account before finalising the album.

Make it easy for clients to order
Once you’ve created your photo album, make it easy for clients to order and receive it. This could include offering a simple ordering process through your website or providing multiple options for delivery or pick-up. Make sure your clients know how to order and receive their album and provide clear instructions for doing so.

Tell a story with your photographs
A photo album should tell a story, whether it’s of a wedding, a family vacation, or another type of event. Consider the narrative you want to convey with your photos and sequence them accordingly. Think about the beginning, middle, and end of the story and how your photos fit into that narrative. I shoot with the album in mind, even if my clients don’t want an album – it actually makes me a better storyteller.

Choose a cover that matches your brand
The cover of your photo album is the first thing your clients will see, so it’s important to choose a colour and design that represents your brand and aesthetic. Consider using your logo or one of our templates. You can also personalise the back of the cover with most of our albums.

Get feedback from others
Before finalising your photo album, seek feedback from other photographers or clients to ensure that it is well-received and appealing. Ask for constructive criticism and take any feedback into account before finalising the album.
